GoHighLevel is an all-in-one software solution that helps businesses automate their sales and marketing processes. With features like website builders, CRMs, email marketing, and more, GoHighLevel aims to be the only software your business needs. Properly setting up your GoHighLevel account is crucial to get the most out of the platform.
This comprehensive guide will walk you through the entire GoHighLevel signup process step-by-step.
We’ll cover:
- Creating your GoHighLevel account
- Choosing the right pricing plan
- Upgrading to the Agency Pro/SaaS plan
- Setting up sub-accounts
- Getting the most value from your account
Follow this guide carefully, and your GoHighLevel account will be ready to skyrocket your business quickly.
Creating Your GoHighLevel Account
Getting started with GoHighLevel is straightforward – visit their website and click the “Start Your 14-Day Free Trial” button. Here are the steps to create your account:
Visit the GoHighLevel Website
Go to gohighlevel.com, and you’ll land on their homepage. Take some time to watch the demo video and scroll through the page to understand what GoHighLevel offers.
Click on the “14-Day Free Trial” Button.
On the top left corner of the homepage, you’ll see a big red button saying “14-DAY FREE TRIAL”. Click on it to get started.
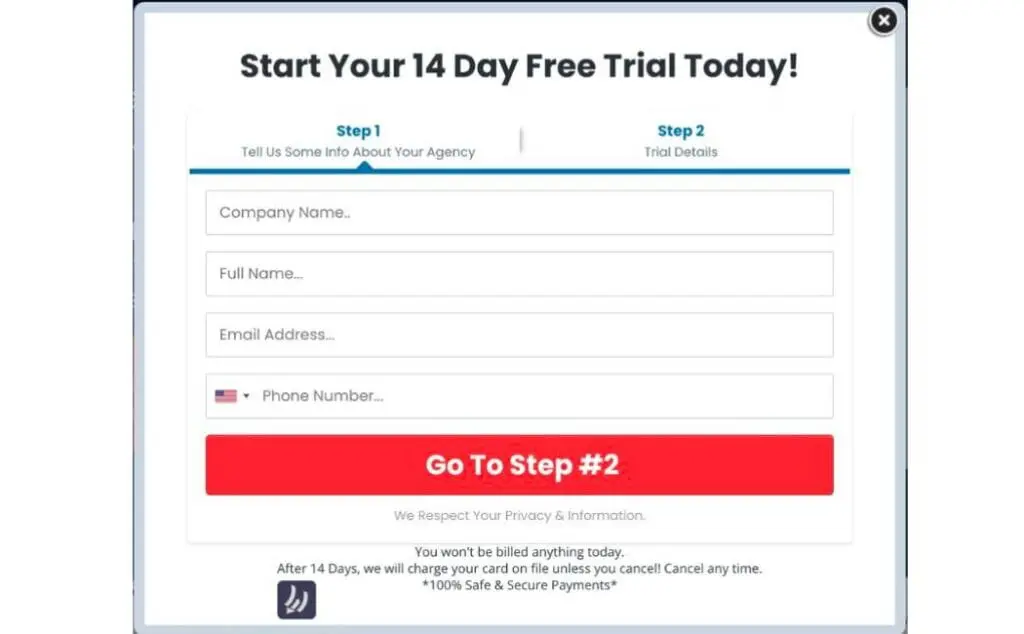
Fill in Your Account Details
A pop-up form will appear. Fill in details like your name, company name, email address, and phone number. These are required to create your account.
Choose a Pricing Plan
Next, you must select one of GoHighLevel’s paid plans to continue. The starter plan limits you to 1 user account, while the Unlimited plan offers more features.
Enter Your Billing Information
Type in your credit card details on the secure checkout page. Don’t worry; you will be charged once the 14-day trial ends.
Activate Your Account
Click the “Start 14-Day Free Trial” button to redirect you to your account dashboard. Just like that, your GoHighLevel account is ready to use!
Choosing the Right GoHighLevel Plan
GoHighLevel offers four main pricing plans:
- Starter – $97/month billed yearly
- Unlimited – $297/month billed yearly
The Starter plan is suitable for solopreneurs and small teams. It lets you build unlimited funnels, websites, and workflows.
The Unlimited and Agency Pro plans to add more account users, lead generation tools, and integration options for larger teams and agencies.
The SaaS Mode unlocks reseller capabilities, white-labeling, and other advanced features.
When signing up, we recommend starting with the Starter or Unlimited plan. You can always upgrade later from your account dashboard.
Upgrading to Agency Pro/SaaS Mode
If you signed up for the Starter or Unlimited plan, here’s how to upgrade to Agency Pro or SaaS Mode:
Access Your GoHighLevel Dashboard
Log in to your GoHighLevel account, and you’ll see the dashboard. Click your profile icon on the top right and select “Account Settings.”
Click on “Upgrade Plan.”
On the left sidebar, click on the “Upgrade Plan” option. This will open the upgrade page.
Select Agency Pro or SaaS Mode
Review the features and prices of the plans. Click the “Upgrade” button below Agency Pro or SaaS Mode to select it.
Confirm the Upgrade
Double-check the details, billing cycle, and price. Click “Confirm & Pay” to complete the upgrade.
And you’re done! The upgraded plan will be activated instantly.
Setting Up Sub-Accounts
With GoHighLevel’s Starter plan, you’re limited to 1 user account. But the Unlimited and Agency Pro plans allow you to create unlimited “sub-accounts.”
Sub-accounts let your team members access GoHighLevel with their logins while keeping everything under your central account.
Here’s how to create them:
Navigate to the “Sub-Accounts” Section
From your GoHighLevel dashboard, click on the Sub-Accounts menu option on the left sidebar.
Click on “Add Sub Account.”
Click the blue “Add Sub Account” button on the open page to create a new sub-account.
Enter Sub-Account Details
Fill in the new user account’s name, email address, password, and profile photo. Then click “Add Sub Account” again.
Set Permissions
You can control each sub-accounts access to tools like contacts, automation, billing, etc. Set up the permissions and hit “Save Sub Account.”
Repeat these steps to create more sub-accounts for your team. It’s that quick and easy!
Getting the Most Value from Your Account
Optimizing your GoHighLevel setup will help you get the most bang for your buck. Here are some tips:
Use the Pre-Made Funnel Templates
GoHighLevel offers done-for-you funnel templates for different industries. Use them as a starting point instead of building everything from scratch.
Integrate Your Other Tools
Connect GoHighLevel to other marketing and sales tools like email providers, webinar software, etc. This automates workflows across platforms.
Learn from the Facebook Community
Join the 18,000+ members of the GoHighLevel Facebook group to get advice and inspiration from experienced users.
Leverage the Available Training
GoHighLevel provides many onboarding resources like videos, manuals, and weekly live training. Consume them to master the software quickly.
Don’t Overpay Monthly – Get the Yearly Discount
You can get a 17% discount on GoHighLevel plans by paying yearly instead of monthly. Look for this option at checkout.
Conclusion
Signing up for GoHighLevel is quick and straightforward. Select a plan that fits your needs and take advantage of the free trial.
Adequately set up sub-accounts for your team and optimize your usage for maximum value. With the right approach, GoHighLevel can transform your sales and marketing.
Use this guide to get your account created and configured. We hope you found it helpful, now it’s time to put GoHighLevel to work for your business!